Zooming and distance.
EasyVFR Basic UK was developed, built and tested by pilots. For that specific reason, the software doesn't always use conventional means of control, simply because over 10 years of experience has taught us that software used in cockpits differs greatly from software used in an office. Buttons should be larger, colors harder and most-used features be available easily.
ZOOMING: One of the primary control differences is found in zooming. The conventional pinch with 2 fingers, when performed in rough air conditions, often leads to undesired inputs which in the end can distract the pilot. Nonetheless, the pinch zoom will work because it's a natural way of zooming to most people. A more robust way of zooming is available however; just slide your finger up and down on the right hand side of the screen to zoom.
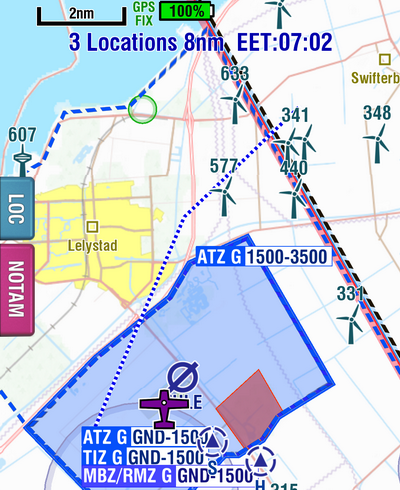
MEASURING: In the 'old paper map days', each pilot had developed tricks to quickly estimate distance by putting his fingers on the map. With no fixed scale, electronic maps don't allow for these nifty solutions anymore. However, in EasyVFR Basic UK If you tap the screen with 2 fingers simultaneously, it will briefly tell you the distance between those 2 points. With 3 fingers, it will tell you the cumulative distance between those 3 points.
In the above example, the dotted blue line equals 8 NM on the present scale. The little black bar top-left indicates how long 2 NM would be on the present scale.
Hide Airspace.
It’s possible in EasyVFR Basic UK to hide all airspace which has a base over a certain level. To do this follow these simple steps.
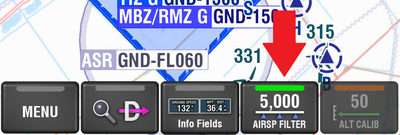
- Tap the Hide Airspace button. In this screenshot it was already set to 5000ft which means that any airspace of which the base is defined as higher than 5000ft will not be shown on the moving map.
- Slide the two wheels to select the new altitude for which you would like airspace above to be hidden. In this example 3000 is selected.
- Tap Select. That’s it! Pretty simply eh?
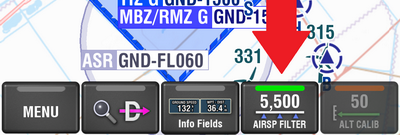
- The Hide Airspace button now shows 3000ft. You can see various pieces of airspace have now been hidden making the map clearer.
- If the altitude that you are flying at comes within 1000ft of the level that you’ve set to hide airspace above, then the hide airspace above level will be increased by 2000ft to ensure that you can always see a reasonable amount of airspace above your level. You will get a message when this happens so that you know what has happened, which you will have to acknowledge.
Location Tab.
The Location tab is designed to make it easy to find the frequency and callsign for the appropriate ATC unit for the airspace that you are in. It also makes reporting your position to that ATC unit simple.
- Tap the “Loc” tab to open the Location tab.
- The tab is now revealed along the top part of the screen.
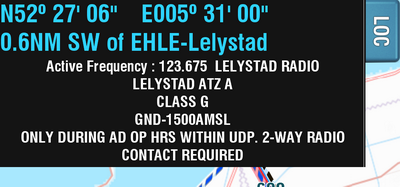
If you are inside controlled airspace it will give the frequency and callsign for the responsible ATC unit. If you are outside controlled airspace it will give the appropriate information frequency. If you are in a LARS area that will also be displayed.
- In addition to the frequency and call sign, the location is shown in both latitude / longitude format and a handy distance and bearing format from an aviation point that ATC are likely to recognise. This makes reporting your position to ATC simple and makes getting help, if you need it, simple and fast.
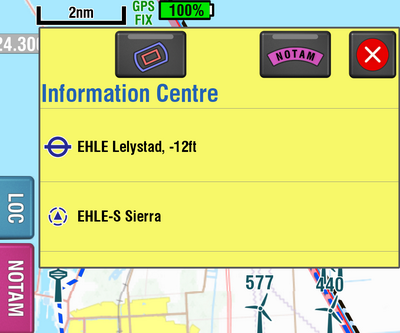
Local Airspace & NOTAM Info.
- If you want to know what airspaces, NOTAMs or objects exist at any point, simply tap that point on the map. A yellow pop-up now appears which lists what's there.
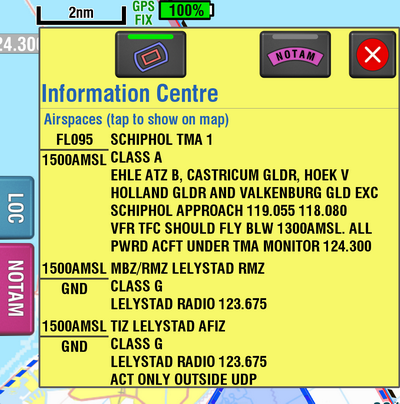
- Tap the Airspace button to view which airspaces exist at the location that you tapped. You can scroll up and down through that list by sliding your finger up and down on the window.
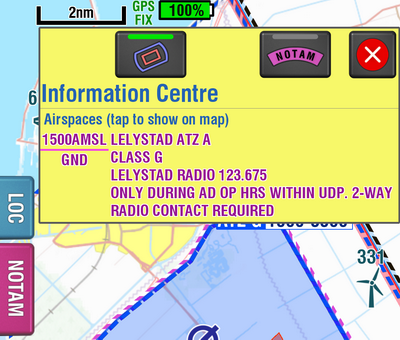
- If you would like to see the exact boundaries of a particular airspace, then simply tap that airspace in the list. Two things will now happen:
- The airspace in the list will now turn magenta to show the airspace selected, and
- The boundaries of that airspace will now be highlighted by a moving magenta checked line.
To stop the highlighting simply close the pop-up with the big red “x” in the top right of the pop-up.
- The same applies to NOTAMs; just press the NOTAM button on top of the yellow pop-up, select the NOTAM of interest from the list and you're done. Remember that some NOTAMs can have unrealisticly great ranges, sometimes even encompassing the entire FIR.
Magnification Settings - EasyReading.
EasyVFR Basic UK runs on a wide variety of hardware with all sorts of different screen sizes. The App will attempt to adjust the size of objects, buttons and text to a size best suited for your device. However you can change these settings if you wish to.
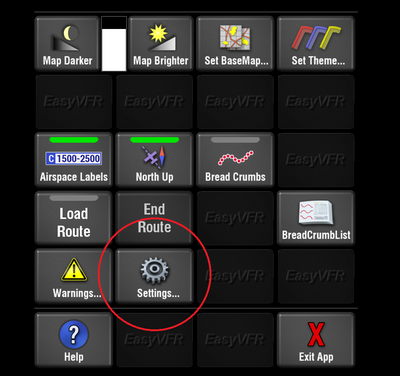
- Call up the menu by tapping the Menu button.
- In the menu that appears, select Settings.
- Then you will be given the choice of adjusting a whole range of settings. The Size of Buttons and Text changes the size of everything in EasyVFR Basic UK, except for the objects on the moving map. The Size of Objects button (with the airport symbol) changes the size of the objects on the moving map.
You can also adjust the size of the plane symbol that indicates your present position on the map, and the size of the text labels you can put alongside airspace boundaries. Airspace magnification level controls the line width used to draw the airspaces on the moving map.
- You can then tap Back to exit the settings window, and tap the Menu button again to remove the menu from the screen.
NOTAM and Airspace Warnings.
An extensive range of NOTAM filters can be applied in EasyVFR Basic UK and setting these is covered in a separate tutorial. When you have filtered your list of NOTAMs you can choose to have those relevant to your flight overlaid on the moving map.
When you are about to enter an area that is NOTAMed, which you have overlaid on the moving map you will receive an alert message. The alert is delivered as both a pop up text message and an alert sound. However you can disable these alerts if you wish by following these instructors.
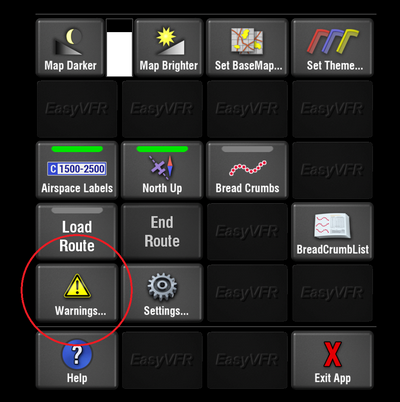
- Tap the Menu button to call up the menu.
- Tap the Warnings button.
- You'll now see the Warnings Settings page. Here are buttons for NOTAM Sound and NOTAM Popup. You can tap these buttons to toggle them on or off. If the button is green, then the warning is turned ON. If it's grey, then the warning is turned OFF.
- When you are finished tap the OK button to save your settings and return to the Moving Map. The Cancel button takes you there as well, but discards your changes.
Map Display Settings.
The display of the map can be adjusted in a number of different ways.
- To start, tap the Menu button to invoke the menu.
- Here you have a number of options to adjust how the map is shown. The Map lighter and Map darker buttons adjust the contrast of the map. You might this this useful if you are having difficulty seeing your display in sunlight. A level indicator is placed in between these two buttons.
Caution:
a too high or too low value may result in the map becoming invisible. Ig your screen is all white and you see no base map, then use the Map darker button a number of times. If the screen is all black, use the Map lighter button a few times.
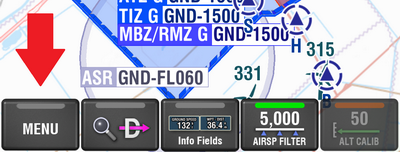
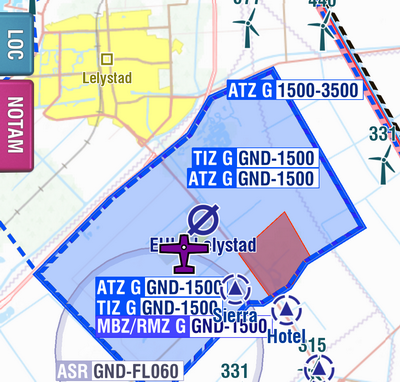
- The Airspace Labels button controls if labels are displayed beside the airspace lines on the map. Tap the button to toggle the labels on and off. If turned on the button will have a green light.
Labels show the Class of the airspace which the line refers to, the lower level of the airspace and the upper level. In the example shown here, we see amongst others a TMZ class G, which extends from the surface up to 1500'AMSL. The label color matches the corresponding airspace's line color.
- To go back to the map, tap the MENU button again.
Load a GPX Flight Plan.
Since EasyVFR Basic UK wasn't meant to be a flight planner, it cannot create flight plans itself besides Direct To plans. However, a variety of flight planners exist that can create .gpx files. These .gpx files are an universally agreed format in which flight plans are stored. EasyVFR Basic UK can read these flight plan files, helping you to stay on track. Loading a flight plan is quite simple:
- Create the flight plan, e.g. using our EasyVFR software.
- Save the flight plan as a .gpx file. How that is done depends on the software used; in EasyVFR you'd press the Export FP button on the FP Tab.
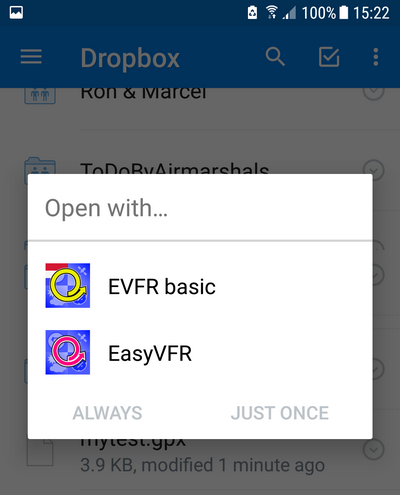
- Put the .gpx file in your DropBox folder.
- On your device, tap the flight plan file in DropBox. Your device will ask you what to do with the file. Select EasyVFR Basic UK as the program you want to open it with.
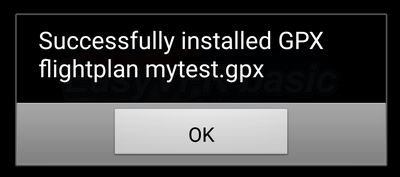
- EasyVFR Basic UK will start, and report that the flight plan was installed. Press OK to proceed.
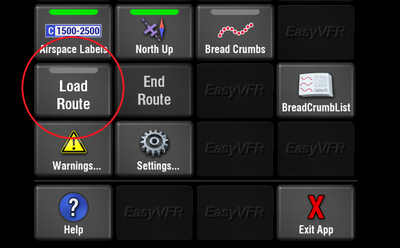
- EasyVFR Basic UK will continue to start as usual. However, the flight plan can now be loaded via MENU | Load Route.
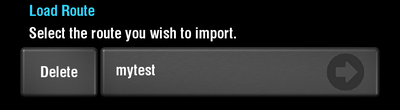
- You may have more than 1 FlightPlan installed; select the one you wish - or deleted some outdated ones first by pressing their Delete buttons.
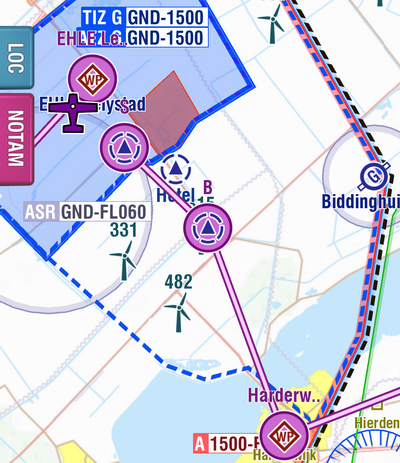
- EasyVFR Basic UK will now return to the moving map screen. The purple line represents the planned flight. Note that you cannot modify the flight plan in EasyVFR Basic UK as you could in EasyVFR Standard or FFM.
- You can end the flight plan via MENU | End Route. The flight plan will remain installed, but not displayed on the moving map.
An alternate, convenient way to get a flight plan loaded is when you get one shared from a nearby EasyVFR user, e.g. your FI or when you're doing a multiship flight. You both need to be on the same WiFi network for this to work.
- The person with the flight plan that you want should load it, then press WiFi FlightPlan on the FP tab in EasyVFR. This will make him the FlightPlan sender,
- To make you the FlightPlan receiver, you select MENU | WiFi Route in EasyVFR Basic UK making sure you do NOT have any flight plan loaded at the time. Moments later, the flight plan will appear in your EasyVFR Basic UK.