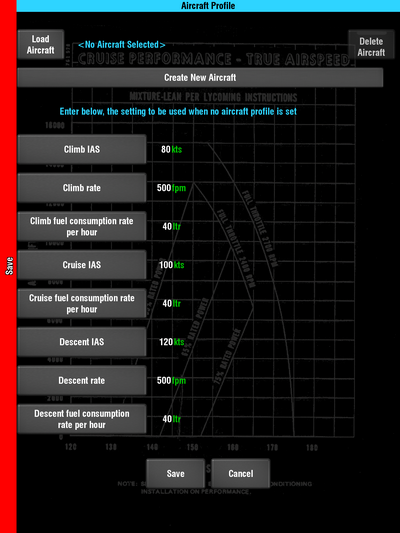
- The first thing that we need to do is open the Aircraft Profiles screen. If you don't know how to do this, then please see the "Creating Your First Aircraft Profile" tutorial before continuing.
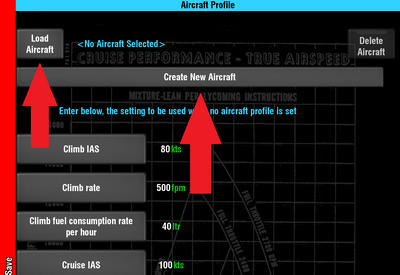
- You can now either load an existing Profile, or create a new one. To load an existing Profile that you created earlier, tap the Load Aircraft button and make your selection. To create a new Aircraft Profile, tap the Create New Aircraft button.
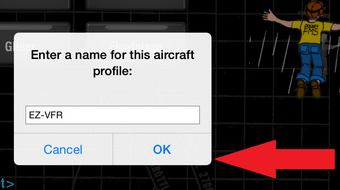
If you created a new Aircraft Profile, then you'll need to give it a name. Again, if you aren't familiar with how to do this, you're better off reading the "Creating Your First Aircraft Profile" tutorial before continuing with this one.
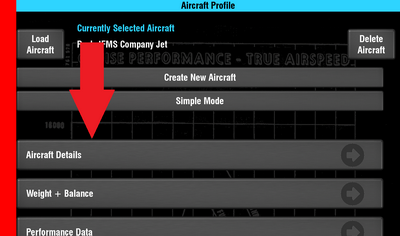
- Now tap the Aircraft Details button.
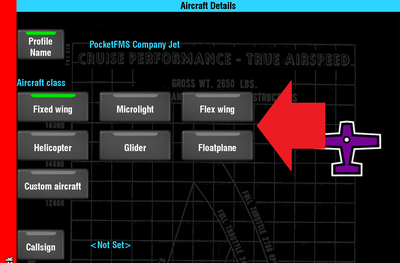
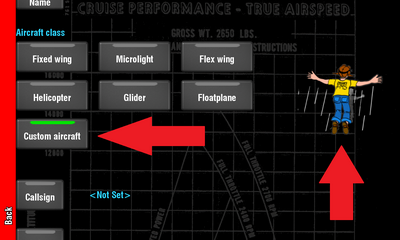
- You now can see the various setting available to you. The first group of settings allows you to choose the type of aircraft that you are creating a Profile for. Just tap the appropriate button. It also sets the plotplane symbol used on the moving map.
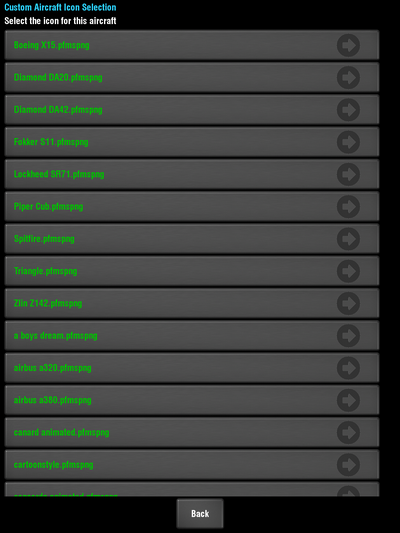
- If you choose a Custom aircraft then you can pick your own aircraft symbol. EasyVFR comes with a selection of possible symbols . .
. . but you can also add your own symbol.
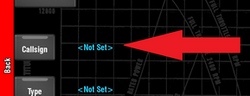
- The Callsign and Type will be used on the electronic flight plan if you choose to file your flight plan with ATC through EasyVFR. Just tap the button, enter your Type or Callsign and tap OK.
If you'd like to know how to file a flight plan with ATC through EasyVFR, then having a look at our tutorial "ATC Flight Plan Filing". It's free to file electronic flight plans with EasyVFR for Frequent Flyer Members!
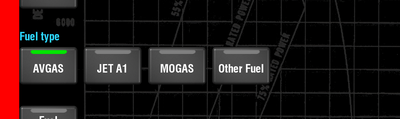
- Now we have 5 items relating to the aircraft fuel. The first, "Fuel type", tells EasyVFR which fuel your aircraft uses. It also allows EasyVFR to know the weight of the fuel per volume which allows you to enter the fuel in the Weight & Balance calculations in volume rather than weight if you so wish. Again, simply tap the button of the appropriate fuel type. The selected fuel type is indicated by the green bar at the top of the button.
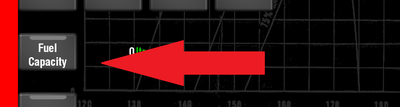
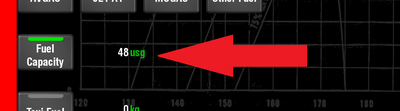
- The Fuel Capacity is the total amount of fuel that your aircraft can hold. Again, simply tap the button, enter the value and tap OK.
If you've followed the "How to Create Your First Aircraft Profile" tutorial, you're already familiar with the smart buttons. But just in case you don't already know, the values for fuel capacity (and other similar items) can be easily entered in whatever units you wish, and converted to any other unit.
For example, if you wished to enter the fuel capacity as US Gallons, then simply tap the "ltr" beside the Fuel Capacity button until it reads USG.
Now you can enter the value in USG. So tap the Fuel Capacity button, and enter your USG value and tap OK.
When the value is already entered, you can easily convert it to other values, simply by tapping the value itself. Keep tapping and it will cycle through all the different possibilities, before returning to USG.
Remember if entering by weight, the weight to volume conversion depends on the fuel type that you've selected above.
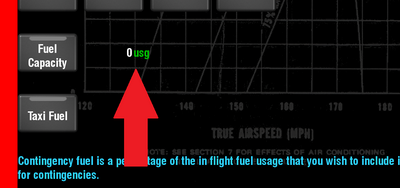
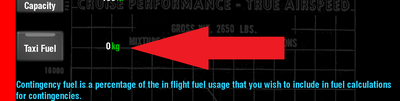
- The final 3 items relating to fuel affect the fuel calculations on your NavLog in the TripKit. (If you haven't come across the TripKit yet, then have a look at the "TripKit" tutorial when you're finished with this one). Taxi Fuel is the amount of fuel that you will use while on the ground. This is the allowance for fuel used while taxiing from your parking position to the runway before departure, and the fuel that you'll use after landing to taxi to your parking space.
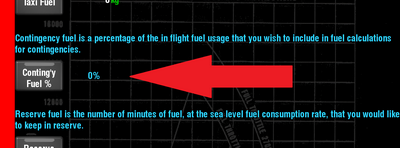
- Contingency Fuel % is the percentage of fuel used inflight that you want to allow for unplanned use. For example errors in your estimate of the fuel consumption rate, extra fuel needed for diverting around bad weather, or holding for a few minutes. It's a percentage of the amount of fuel planned to be used inflight.
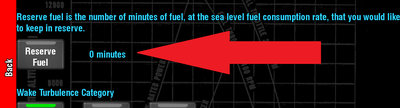
- Reserve Fuel % is a fixed number of minutes that you would like to remain on-board to allow for unforeseen delays, and to ensure that you dont land with dry tanks. Its calculated based on fuel consumption at cruise speed at sea level.
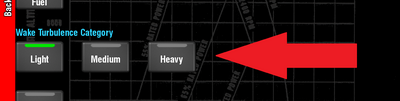
- The "Wake Turbulence Category" is used for when you're filing an electronic flight plan with ATC.
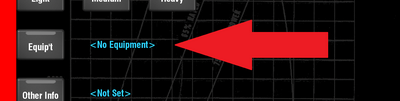
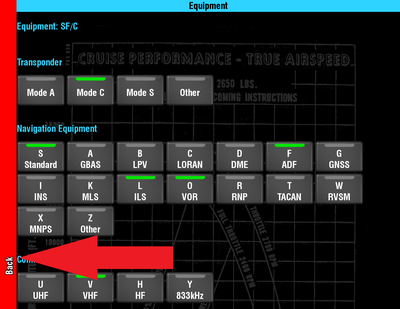
- Tapping Equipment will bring you into another screen:
Here you can select which equipment is on-board this aircraft. These details will be used when you're filing an electronic flight plan with ATC. After making your selection, tap the red "Back Bar" on the left hand side to get back to the Aircraft Details section.
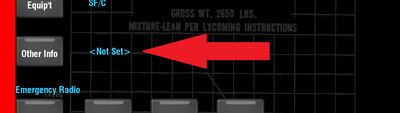
- The Other Info button takes you to a new screen where you can set additional details that go into the "Field 18 Other Information" on your electronic flight plan with ATC.
Enter any required information and tap the red "Back Bar" to return to the main aircraft details screen.
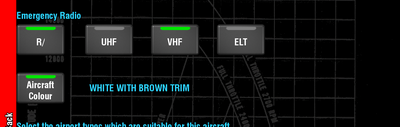
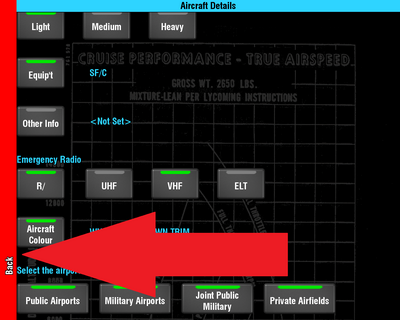
- "Emergency Radio" and the Aircraft Colour button allow you to set these details for filing your electronic flight plan with ATC.
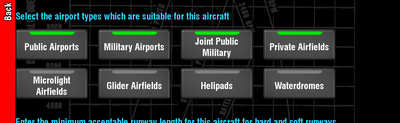
- The final 3 sections allow you to specify what type of airports are suitable for this aircraft. The first one allows you to specify if you can use Glider Airfields, Helipads etc. If it's got a green bar on the top, then these types of airports will be considered suitable for this aircraft. If there is no green bar on the top, then it's not considered suitable. To change the status, simply tap the button.
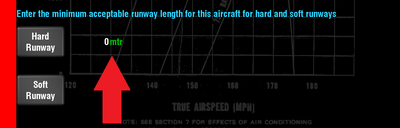
- The hard- and soft runways determine how long the runway has to be for it to be considered acceptable. For example, if your aircraft (or indeed you!) require a hard runway that is 500 meters or longer then
- Tap the numbers until they show "mtr". This means that any entry you name make will now be in meters.
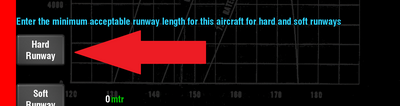
- Tap the Hard Runway button.
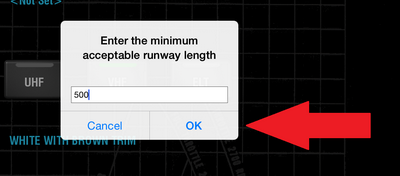
- Enter 500.
- Tap OK.
You can easily show this converted to feet by tapping where it says "500mtr" and it will be converted to feet for you. Tap again and it will return to meters. If you require 650 meters of runway for soft runways (e.g. grass) then repeat the above for the Soft Runway, entering 650.
If you use the Nearest button when on the moving map, unsuitable airfields will be greyed out in the list.
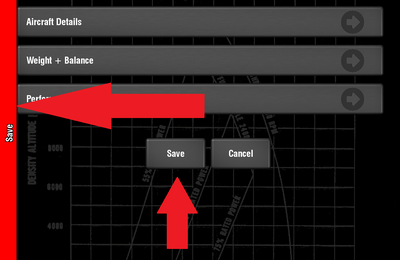
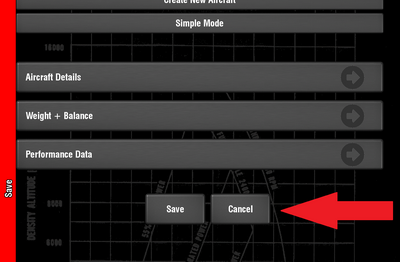
- To save your work, tap the red "Back Bar" to return to the main Aircraft Profiles screen.
Then tap the red "Save Bar" or the Save button at the bottom to save the Profile.
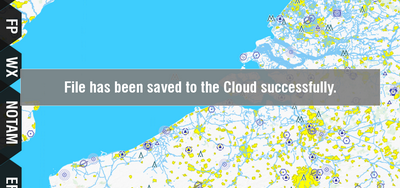
- Once the Profile has been saved and you are connected to the internet, EasyVFR will attempt to save it to sync across all your devices. You will get a message after a few seconds telling you if the Aircraft Profile was successfully saved to the PocketFMS Cloud or not.
- If for some reason you don't wish to save this Aircraft Profile you can instead tap the Cancel button on the bottom, and this Profile (or if you've previously loaded one: any changes that have been made) will not be saved.
That's it! Not too complicated as you can see. For further guidance on the other settings in Aircraft Profiles and getting the most out of the Aircraft Profiles function, see the other Aircraft Profiles tutorials.