Power Settings using Expert Mode.
EasyVFR allows you to create and load Profiles for the aircraft that you regularly fly. If you haven't yet created your first Profile, then please see the "Creating Your First Aircraft Profile" tutorial for a guide on how to create one.
Once you have created your Aircraft Profile, you then have two choices for Performance Data.
For most users, Easy Mode will be sufficient. It allows you to enter basic performance data for speed, fuel consumption and rate of change in altitude, all for performance at sea level. EasyVFR will automatically calculate your increased TAS with increased altitude and will take account of the drop off in performance in a normally aspirated engine as you climb above a certain altitude. The use of Easy Mode is fully described in the "Creating Your First Aircraft Profile" tutorial.
However, if you want to enter more detailed performance data, for more accurate calculations, or because you fly a turbo equipped aircraft that doesn't suffer reduced performance with altitude, then you can use the Expert Mode.
All speed values entered in Easy Mode are IAS and all speed values entered in Expert Mode are TAS. One thing to note here is that Easy Mode and Expert Mode are incompatible with each other. You can only have one or the other set for an aircraft. So if you have Easy Mode data entered and change to Expert Mode, then all your performance settings for Easy Mode will be lost, and likewise if you have Expert Mode data entered and change to Easy Mode, then all your performance settings for Expert Mode will be lost.
In this tutorial, we will look at using the Expert Mode for performance data.
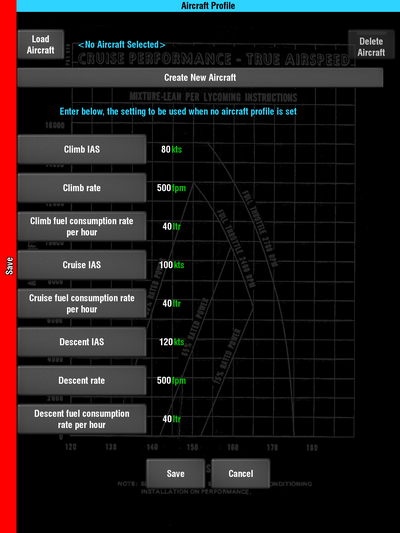
- The first thing that we need to do is open the Aircraft Profiles screen. If you don't know how to do this, then please see the "Creating Your First Aircraft Profile" tutorial before continuing.
- You can now either load an existing Profile, or create a new one. To load an existing Profile that you created earlier, tap the Load button and make your selection.
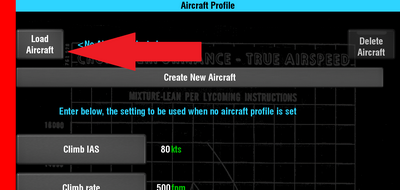
To create a new Aircraft Profile, tap the Create New Aircraft button.
If you created a new Aircraft Profile, then you'll need to give it a name. Again, if you aren't familiar with how to do this, you're better off reading the "Creating Your First Aircraft Profile" tutorial before continuing with this one.
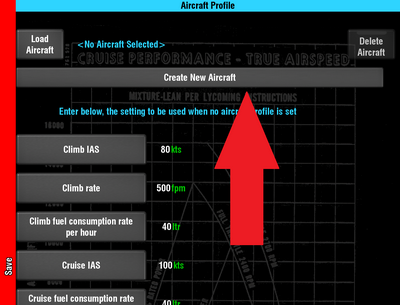
- Now tap the Performance Data button.
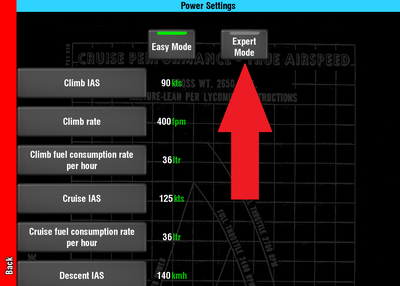
- We now have the option of entering data in Easy Mode or in Expert Mode. Since this tutorial is about using the Expert Mode, it will come as no surprise that you'll need to tap Expert Mode button!
- You will get a warning that by continuing, you'll lose any performance data entered Easy Mode. Tap the Yes button..
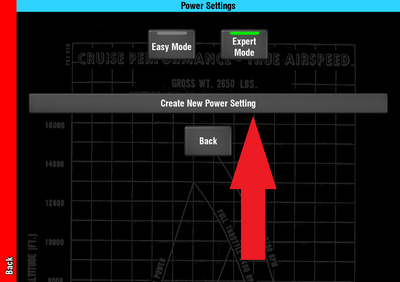
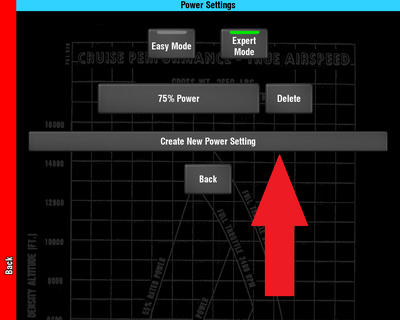
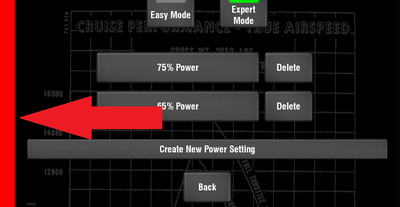
- With Expert Mode, you have the option of having more than 1 power setting. These could be for example, 100% Power, 75% Power, 65% Power and 55% Power, or they could be 2500rpm, 2400rpm, 2300rpm, or they could be "Max Performance", "Normal Performance", "Economy Performance". It's entirely up to you how you use them, and indeed you only need to have one.
- To create our first one, tap the Create New Power Setting button.
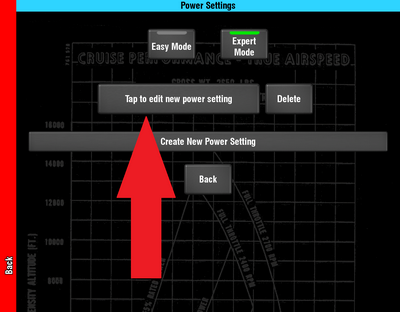
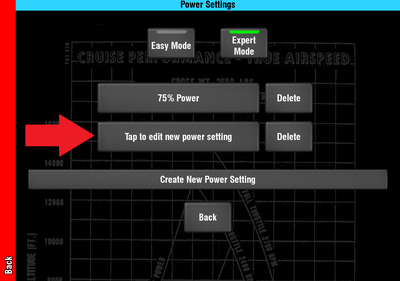
This brings up to new buttons. One for the power setting that we just created, which is labelled "Tap to edit new power setting" (because we haven't given it a name yet), and a second one to delete this power setting.
- Tap the button that says Tap to edit new power setting.
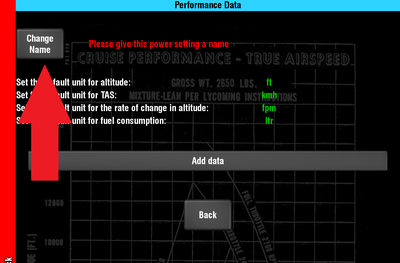
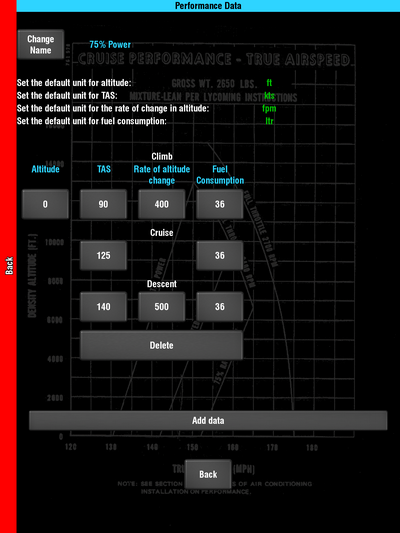
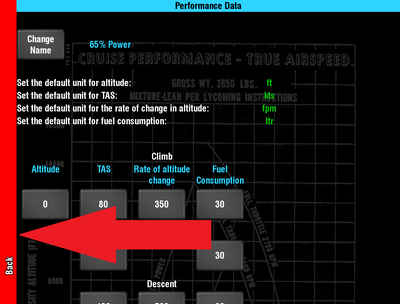
This will bring you to the above performance data entry screen.
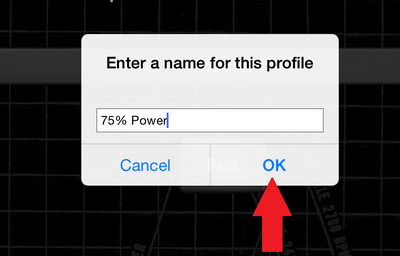
- The first thing that we need to do is to give this power setting a name. In this case, we are going to call it "75% Power". Tap the Change Name button.
- Type in "75% Power" and tap the OK button.
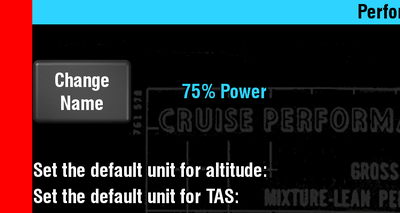
The name will now be written beside the button.
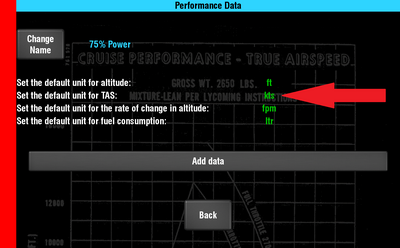
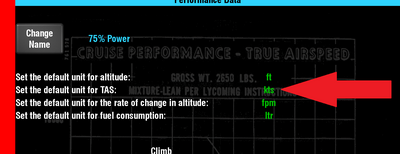
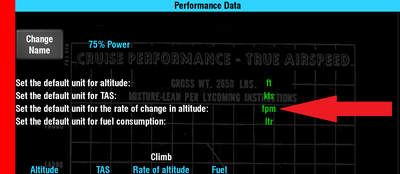
- Next we need to select the units that will be used for this power setting. For example, if we wish to enter speeds in KTS, tap the green text to the right of "Set the default unit for TAS:". It will cycle through the various options. Stop when it shows "KTS".
You can do likewise to change the units being used for altitude, rate of change in altitude and fuel consumption.
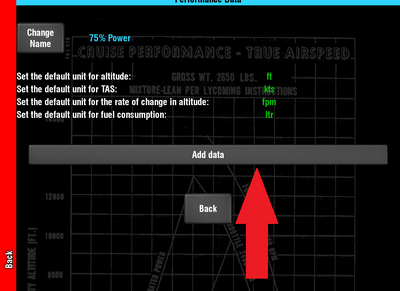
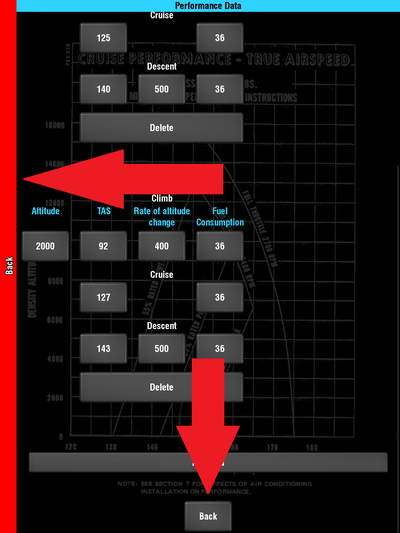
- The performance data is entered for various different altitudes, and EasyVFR will interpolate between them.
- Let's add our first altitude which will be for sea level (0 ft). To start, tap the Add data button.
- We now have an array of buttons. The precise layout will vary depending on your screen size, so don't worry if it looks different from that shown here. The same buttons are shown, just perhaps in a slightly different layout.
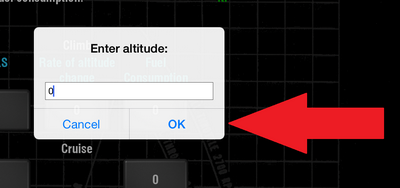
- To set the altitude, tap the Altitude button. Ensure "0" is entered in the box and then tap the OK button.
Actually we didn't really need to do this, as "0" was already there, but now you've seen how to change it.
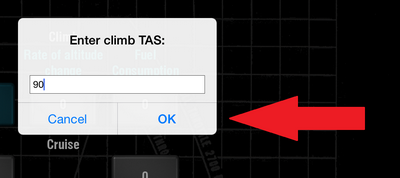
- Now tap the TAS button under the climb section. This is the TAS for climbing when at sea level at this power setting. Enter the appropriate value and tap OK.
Note that you don't enter any unit type such as knots. The unit type is what's shown at the top, in green text, to the right of "Set the default unit for TAS:". So if this shows KTS, then any value you enter for TAS will be taken as knots.
- Now repeat for "Rate of altitude change" under the climb section and enter the climb rate at sea level, by tapping the appropriate button, and entering the value. Again the units entered will be taken as those shown in green text at the top of the screen, to the right of "Set the default unit for the rate of change in altitude".
- Now repeat for "Fuel Consumption" under the climb section under the climb section.
- Now repeat for the values under the Cruise and Descent sections.
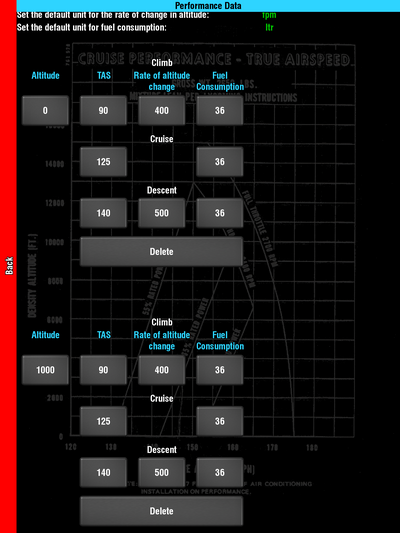
- Now we need to add the next set of values for the next altitude. Tap the Add data button to make space for adding another altitude. If you can't see it, just scroll down a bit.
- You'll notice a new altitude has been automatically added 1.000ft above the previous one, and all the values have been copied across from the 0 ft settings. This saves you having to enter again anything that hasn't changed.
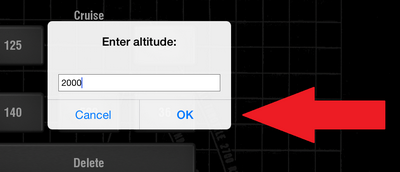
- This time we'll add altitude data for 2.000 ft. So tap the 1000 altitude button, and change the value to 2000 and tap the OK button.
If an altitude of 1000 ft is selected in the FlightPlan but there is no 1000 ft altitude data in the performance data, then EasyVFR will interpolate the values between 0 and 2000 ft.
- Make any changes that you need to by tapping the appropriate buttons and updating the values.
- Repeat this for the different altitudes that your aircraft is capable of flying at.
- You'll eventually reach an altitude that you can no longer continue your climb. You are not allowed to enter a 0 value, as EasyVFR does not have a way of handling your flight if you enter an altitude above this. So for the final value, if you want to handle this, you are best to enter a climb rate of 1.
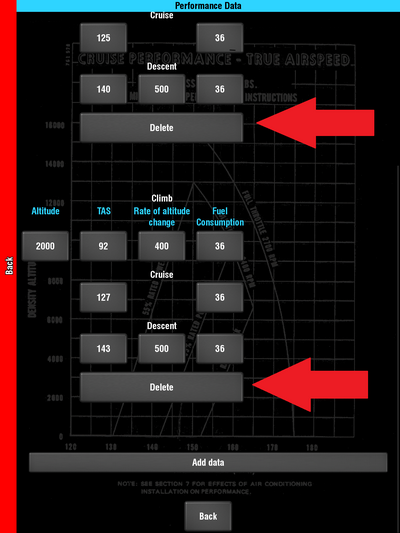
- If for some reason you decide you want to remove data for a particular altitude, then find the Delete button associated with that altitude, and tap it.
- You've now entered your data in Expert Mode for this power setting. Now let's add another Power Setting. Tap the red "Back Bar" on the left, or the Back button at the bottom.
- To add another power setting, tap the Create new power setting button.
- Now tap the Tap to edit new power setting button and repeat the steps above, giving it a new name (e.g. 65% Power).
- Tap the red "Back Bar" when done.
- If for some reason you want to delete a power setting that you entered, you can simply tap the Delete button to the right of its name.
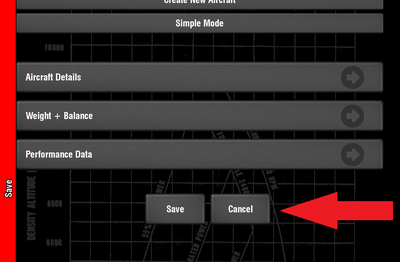
- That's it! You've now entered your data in Expert Mode. To save your work, tap the red "Back Bar" to return to the main Aircraft Profiles screen.
- Then tap the red "Save Bar" or the Save button at the bottom, to save the Aircraft Profile.
- Once the Profile has been saved and you are connected to the internet, EasyVFR will attempt to save it to sync across all your devices. You will get a message after a few seconds telling you if the Aircraft Profile was successfully saved to the PocketFMS Cloud or not.
- If for some reason you don't wish to save this Aircraft Profile, you can instead tap the Cancel button on the bottom, and this Profile (or if you've previously loaded one: any changes that have been made) will not be saved.
Congratulations. You're now an expert power setting user!
For further guidance on the other settings in Aircraft Profiles and getting the most out of the Aircraft Profiles function, see the other Aircraft Profiles tutorials.