- The first thing that we need to do is open the Aircraft Profiles screen. If you don't know how to do this, then please see the "Creating Your First Aircraft Profile" tutorial before continuing.
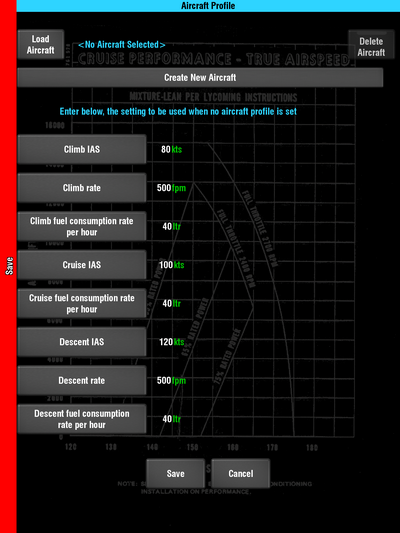
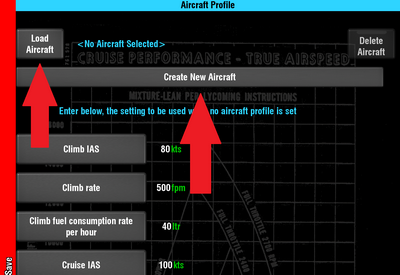
- You can now either load an existing Profile, or create a new one. To load an existing Profile that you created earlier, tap the Load button and make your selection. To create a new Aircraft Profile, tap the Create New Aircraft button.
If you created a new Aircraft Profile then you'll need to give it a name. Again, if you aren't familiar with how to do this, you're better off reading the "Creating Your First Aircraft Profile" tutorial before continuing with this one.
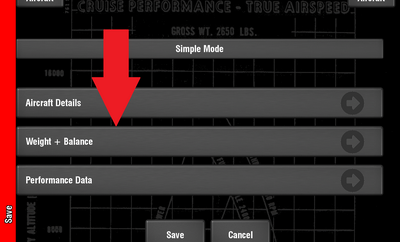
- Now tap the Weight + Balance button to enter the W & B section of the Aircraft Profile.
- When you enter it for the first time for a particular aircraft, you'll have to set up some information relating to the loading schedule (what the loading points are for your aircraft), and the limiting points (the envelope that your load must fit into). If we've confused you with those terms, don't worry. If you've ever prepared a paper W & B calculation before, then these will become very obvious to you as we work through this tutorial.
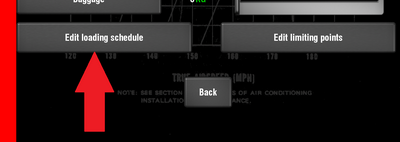
- Let's first look at the loading schedule. Tap the Edit loading schedule button.
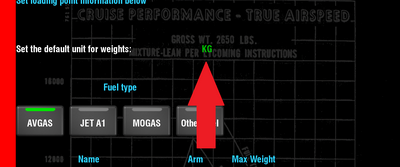
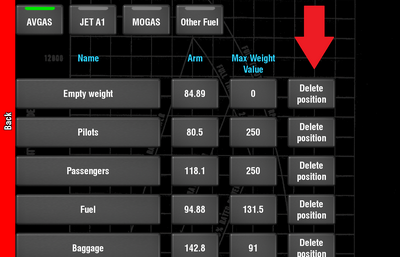
- The first thing that you need to set is the units that your W & B graph is prepared in. This is shown at the top beside the heading "Set the default unit for weights:". This can be in kg or LBS. Simply tap the green text to swap between units.
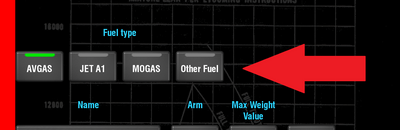
- The second thing that you need to do is to set the fuel type. That's because EasyVFR will allow you, if you wish, to enter fuel in quantities such as litres or gallons instead of weights. However, in order to do so it needs to know which type of fuel you are using to do the conversion correctly.
Simply tap the appropriate button for the fuel type.
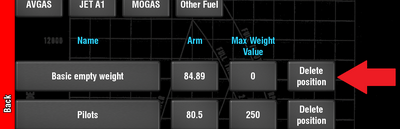
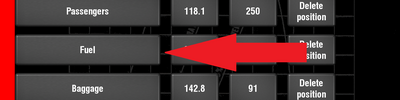
- To help get you started, a sample loading schedule is already set up. Each row has 3 entries and a delete button. If for some reason you don't need a particular row, then simply tap the Delete position button.
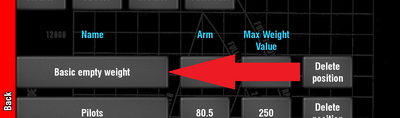
- Let's look at the first one. The name of the position is "Basic empty weight". Your aircraft load schedule might call this something else. It's the weight of the aircraft when it's empty.
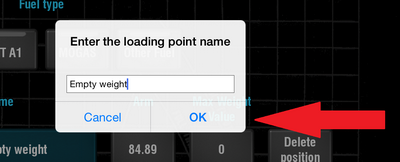
You can easily change the name to match what is in your aircraft load schedule. Simply tap the button Basic empty weight.
Then change the description to what you want it to be, and tap OK.
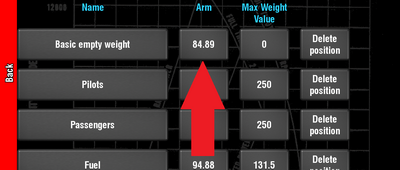
- The arm relates to the distance that this loading position is from the centre of gravity reference point. You'll need to look this up for each position in your own aircraft Weight & Balance schedule.
To change it to the correct value for your aircraft, simply tap appropriate button, type in the new value, and tap the OK button.
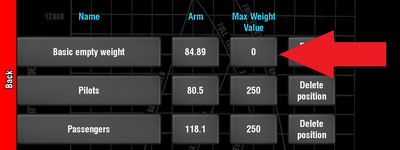
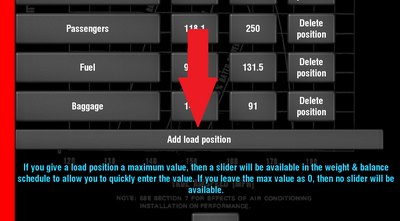
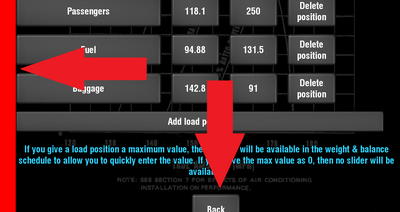
- The Max Weight Value will be new to you and you won't find it in your paper based aircraft Weight & Balance schedule. This refers to the heaviest weight that you ever expect to carry in this loading position. For example, if you believe that you'll never carry more than 100 kg in your baggage compartment, then you could enter 100 KG as the maximum weight for the baggage compartment.
The significance of this entry becomes apparent later when we attempt to calculate a Weight & Balance for a particular flight. To make things easier and quicker, you can change weights by use of a slider control. The value entered here allows EasyVFR to know the weight to enter in the calculations if the slider is set to maximum weight.
For the moment, don't worry too much about it. Just set it to what you think is the largest figure that you'll ever need to enter for the weight in this load position. You can always change it later.
If you enter "0" as the weight, then no slider will be available for this position. That for example, is appropriate for the basic empty weight. That weight rarely changes, so you don't want a slider for it.
To change the maximum weight for any position, simply tap the appropriate button, enter a new value and tap the OK button.
- Now copy in all the loading positions and their arms from your aircraft Weight & Balance table, and choose your maximum weights. Don't worry, you can always change the maximum weights later if you need to.
- One important point to bear in mind here has to do with fuel. When we are finished, your Weight & Balance chart will be shown as a line, showing your W & B at take-off, and the W & B with all fuel burnt off. In order for EasyVFR to know which load position contains fuel, it checks for the word "Fuel" in the name of the load position. So please make sure that any fuel position contains the word "Fuel" in its name. It's not case sensitive, and you can have other text around it (e.g. "Main fuel tanks"). You just have to make sure the word "fuel" is somewhere in that name.
- If there are too many sample rows already, then delete the extra ones by tapping the Delete position buttons.
- If you need extra rows, then tap the Add load position button.
- When you're finished, tap either the red "Back Bar" or the Back button at the bottom of the screen to return to the main Weight & Balance screen.
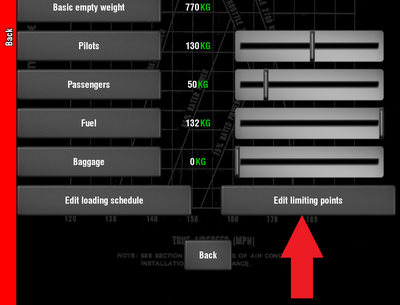
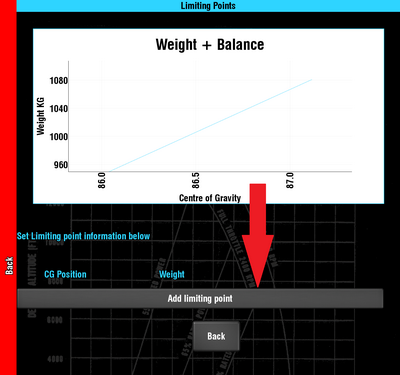
- Now let's look at creating the limiting points for your graph. Tap the Edit limiting points button.
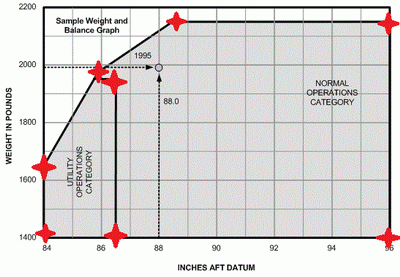
- Here we need to create the envelope that your aircraft W & B must fit into. These points should be found in your aircraft POH. You can probably read them ok from the paper graph, but the precise data will usually be found in text in the POH.
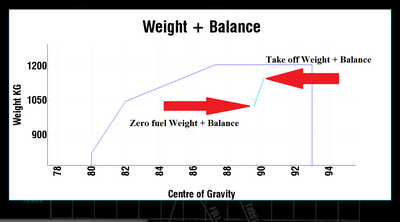
To clarify, when we talk of limiting points, it's the points shown red stars in this image that we're referring to:
This is what we are attempting to enter. To add the first one, tap the Add limiting point button.
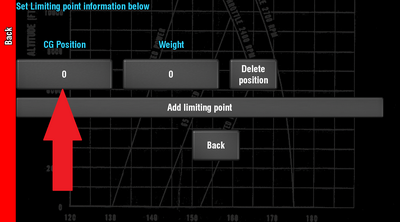
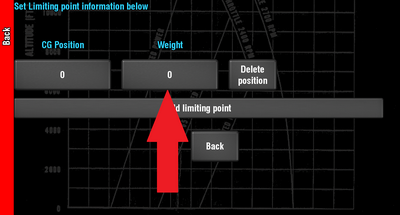
- Now 3 buttons appear for this load position. Tap the CG position button.
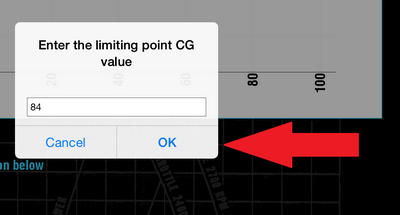
- Enter the correct Centre of Gravity value, and tap OK. For example, in the graph above the CG position of the bottom left star, is approximately 84.
- Now you need to enter the corresponding weight value, in the units you set as default weight units on the loading screen. So if you set them in KG there, then you need to use kg values here.
To set this for the first loading position, tap the Weight button on this row.
Enter the appropriate value, and tap OK. For example, in the graph above the weight of the bottom left star is approximately 1400 LBS. If you have LBS as default, you could enter this now. If you were using KG as default, you should work out the correct kg value, then enter that value.
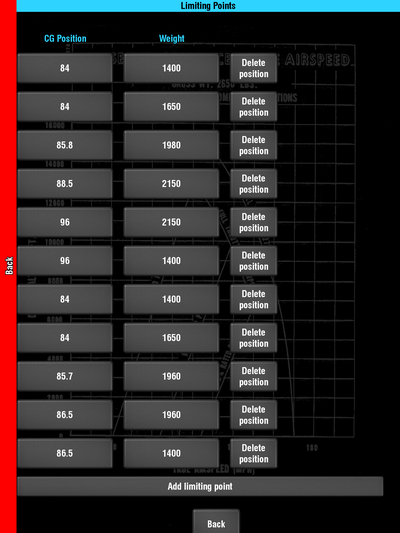
- Repeat this until you have the entire envelope entered.
- For complex graphs, such as the one above, remember that the limiting points is just a line connected by a series of points. You can do an outline if you wish, and double back on yourself. So for this example, you could start off at 84/1400, moving up to 84/1600, and across the top, and back the right hand side, across the bottom, and to continue through the Utility Category.
The entries to make the above graph, if default weight was set to LBS, would look something like this:
- With your entries completed for your aircraft, tap either the red "Back Bar" or the Back button at the bottom of the screen, to bring you back to the main Weight & Balance page.
- Now you have your data entered for your aircraft. If you've entered these items correctly, you'll probably never have to touch them again until your aircraft is re-weighed.
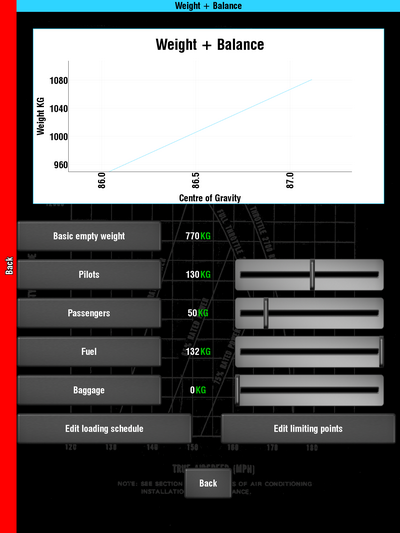
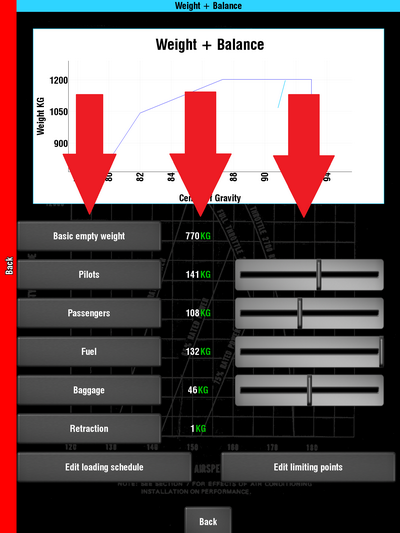
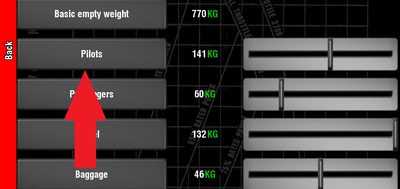
- Now when you wish to do a W & B for a particular flight, this main Weight & Balance page is all that you will need. You'll notice that we have 3 controls for each line:
- A button
- A weight value
- A slider control.
You'll notice that a slider control is only available for any loading position that you entered a Max Weight Value for.
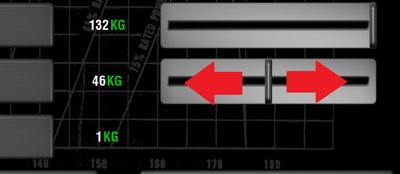
- To change the weight for any position, the easy way, simply place your finger on the slider control and slide it left or right. As you do so, you'll see that the value for the weight of this position changes. You'll also see that the balance line in the graph is updated to reflect the new weight.
Apart from the slider making it very easy to quickly update the weight values, it also allows you to very quickly visualise the effect of changing the weight of any position.
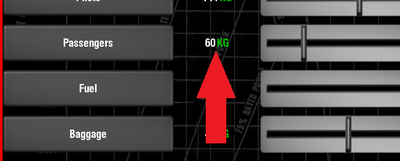
- The second way of changing the weight of any position is to tap the button for the load position, and in the pop up, type in the new value, and tap the OK button.
- Note that any values that you enter here, are entered in the units shown. So if the value shown before entry is 100KG, then if you enter a new value of 120, it will be taken as 120 kg.
You can change the value into a different value by tapping the numbers.
This will cycle through the different possibilities. If you change a value to LBS, then when you change the value by pressing a button as described above, then you'll be entering the new value in LBS. The slider control will adapt appropriately to any new value.
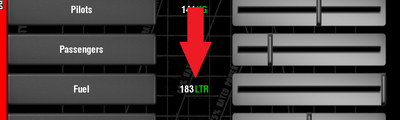
- Note that to make life easier for you, you can enter the fuel in volume if you wish. For example, if you wish to enter your fuel in litres, then tap the value for Fuel until it's shown in litres.
Now you can use the slider or the button to change the value in litres and EasyVFR will automatically work out the correct weight to use for the graph.
- In the graph you can see a line representing your W & B. The top of this line represents your Weight & Balance at the time of take-off. The bottom of this line represents your W & B with zero fuel loaded.
As noted earlier, EasyVFR will calculate your zero fuel weight and balance by taking any loading position which contains the word "Fuel" in its name and reducing it to a zero weight value for zero fuel. So please make sure that your fuel entry contains the word "Fuel" in it somewhere and that none of the others do.
- Your Weight & Balance graph, as prepared here, will also be visible in your TripKit. The TripKit will also contain a table of calculations that backup the graph.
- The fuel load that you enter in the Weight & Balance graph will also be used to estimate your endurance for the electronic ATC flight plan filing if you use EasyVFR to file your flight plan. You can of course change that value in the electronic flight plan section of EasyVFR if you so wish.
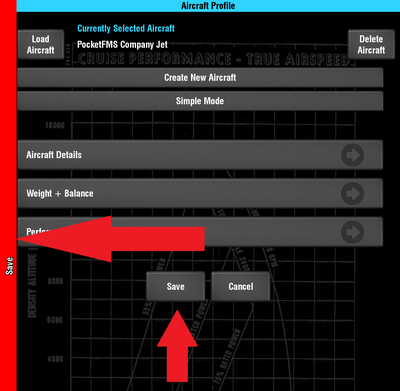
- Now to get back to the main Aircraft Profile screen, tap either the red "Back bar" on the left, or the Back button at the bottom of the screen.
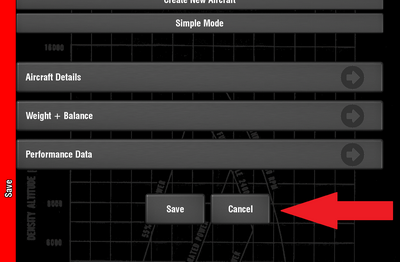
- Now to save your changes, tap either the red "Save bar" on the left or the Save button at the bottom of the screen.
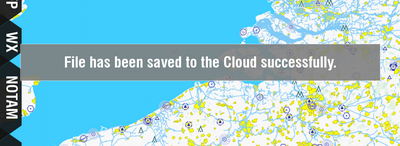
- Once the Profile has been saved and you are connected to the internet, EasyVFR will attempt to save it to sync across all your devices. You will get a message after a few seconds telling you if the Aircraft Profile was successfully saved to the PocketFMS Cloud or not.
- If for some reason you don't wish to save this Aircraft Profile you can instead tap the Cancel button on the bottom, and this Profile (or if you've previously loaded one: any changes that have been made) will not be saved.
That's it. The hard work is now all done. Now all you need to do before any flight is quickly adjust the sliders to set the correct weights for your flight, and your Weight & Balance graph is visible on screen and ready for printing as part of your TripKit. EasyVFR, making your VFR flights easy!
For further guidance on the other settings in Aircraft Profiles and getting the most out of the Aircraft Profiles function, see the other Aircraft Profiles tutorials.