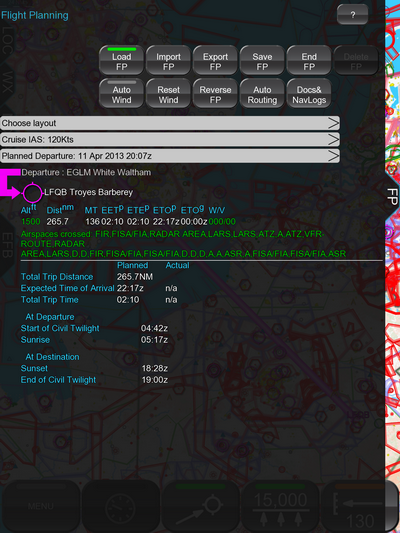
- You should now have a simple Direct To Route that looks like this:
 |
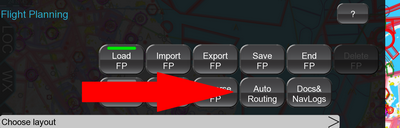
- Now it's time to tell EasyVFR what magic we'd like it to do for us. On the FlightPlan tab, press Auto Routing.
 |
- You will now see a table of options affording you lots of control over the route which will be created for you.
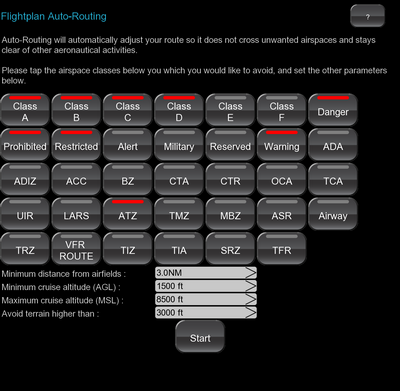 |
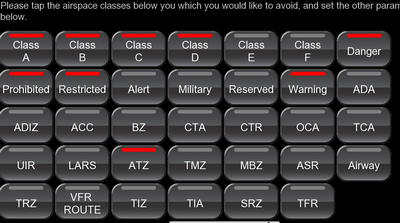
Looking at the buttons first, all of the buttons represent different classes and types of airspace that can be automatically avoided for you. For example there are classes A through F, Danger, Prohibited and Restricted areas, ATZ, Special Rules Zones, Transponder Mandatory Zones, Alert areas (eg Nature Reserves), Warning areas (eg High Intensity Radio Transmission Areas) etc.
If you want to avoid a particular type or class of airspace tap the button. This will illuminate a red bar indicating that you do not wish to cross such an airspace.
In this example we ask EasyVFR to avoid airspaces of class A through D, danger, prohibited and restricted areas, warning areas and ATZs. To do this tap each of these buttons until a red bar is displayed on its button, and ensure that none of the other buttons have a red bar on them.
 |
- Below these buttons you will see that you have further control over your route.
 |
Please note that on smaller screens you may have to scroll down to see these options.
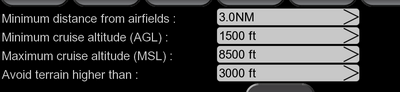
Not all airfields have an ATZ or controlled airspace, but you may wish to stay away from all airfields to avoid flying in proximity to local traffic, particularly if this is to be a low level flight. To set the minimum distance that you would like to avoid airfields by, simply tap the grey control which is located to the right of the text "Minimum distance from airfields".
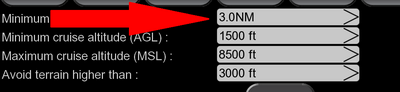 |
- In the pop up box type in the minimum distance that you’d like to avoid airfields by, and tap Ok. Please note that on Android you will have to tap inside the box to bring up the keyboard.In our case let’s set it to 3.0 NM which should give us good clearance from the airfield.
- In a similar way you can set your minimum cruise altitude above ground level. Tap the grey control to the right of "Minimum cruise altitude (AGL)".
 |
In our example, let’s set this to 1500ft. This means that the lowest that we want to fly is 1,500ft about the ground. EasyVFR will take the ground elevation into account when working out your route.
- Likewise you can set the maximum altitude AMSL that you are willing to fly. In this example we will set it to 8,500ft.
- Finally you can tell EasyVFR that you don’t want to fly over particularly high terrain by setting the "Avoid terrain higher than" in the same way as we did above. In this case we’ll tell EasyVFR that we would not like to fly over terrain that is higher than 3,000ft.
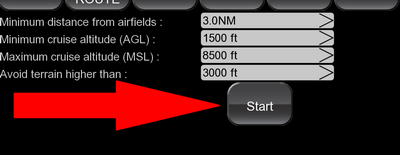
- That’s it! Now we just let EasyVFR get on with the hard work. Tap Start, which is located just below the "Avoid terrain higher than" control.
 |
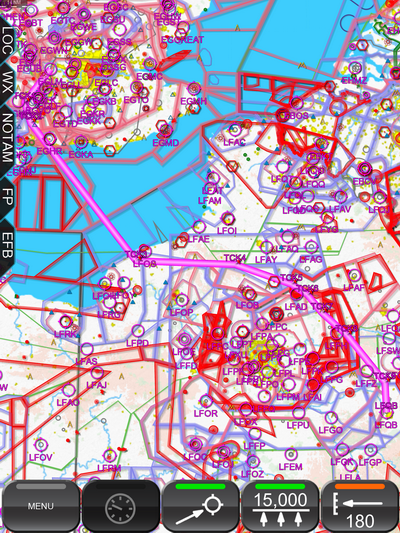
- EasyVFR will now find a route that matches your requirements, while the progress bars will keep you updated on the calculations.
- When the calculations are completed, your route will be shown on the FP (FlightPlan) tab.
EasyVFR has just found you a route, meeting your conditions, between the two airports through two of the busiest airspaces in Europe, London and Paris, all without you having to make any effort whatsoever!
 |
- One point worth remembering is that in the calculations AGL airspaces are treated as AMSL. So if your route has AGL airspaces, some manual adjustment of the route generated may be required.
- One feature worth nothing is that your starting route does not have to be a simple Direct To Route. If you wish your route to include certain waypoints you can put them into your flight plan before using the Auto Routing.
For example if you wished to route via Dover, then you could have added Dover as a waypoint in your Route before selecting the Auto Route. Then the routing would have gone via Dover! This allows you significant control over the route generated for you.
Auto Routing - FlightPlan generation without the hard work!
