- Start EasyVFR and ensure that that map is visible.
 |
- Press and hold (continue to press) for 2 seconds on EGCK Caernarfon. After approximately 2 seconds a pop up will appear that looks similar to this:
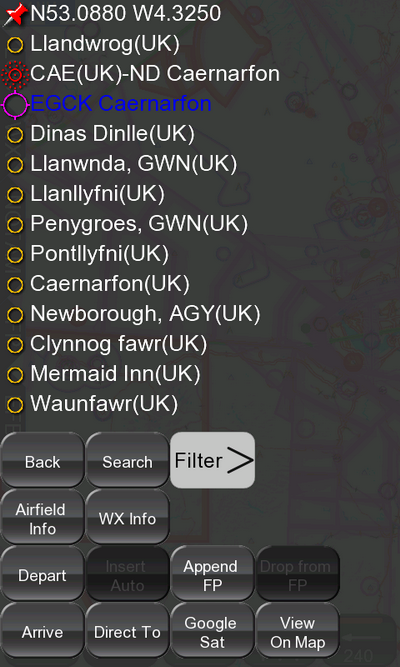 |
This screen is showing all the places that are close to the location that you pressed on, in order of increasing distance from the point that you pressed on. This makes it extremely easy to use in-flight as even an inaccurate press will likely result in your desired place or object being listed.
The symbols on the left indicate what type of object the name represents, starting with the coordinates of the exact location that you tapped on the screen.
- Tap "EGCK Caernarfon" in the list of places. It will turn blue to indicate that it has been selected.
- Now tap the Depart button at the bottom of the screen.
This will bring up a confirmation message confirming that you have now set your departure point and explaining how to continue.
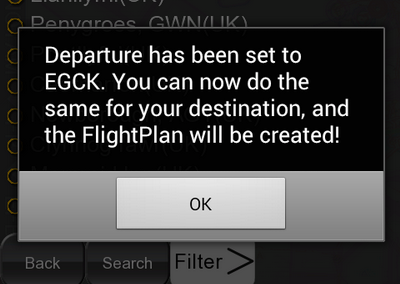 |
- Tap OK to acknowledge.
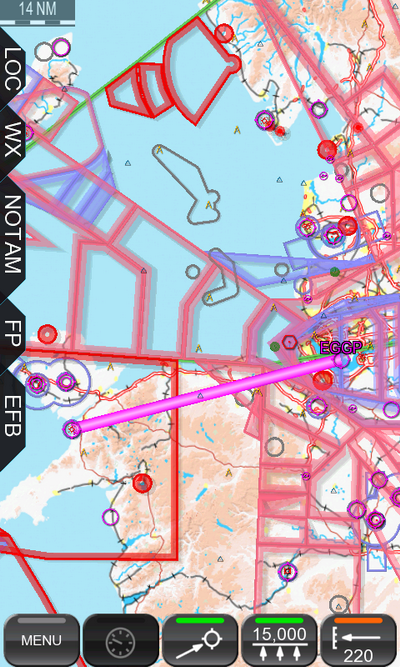
- Now press and hold for 2 seconds on "EGGP Liverpool". This will bring up a similar list of nearby objects.
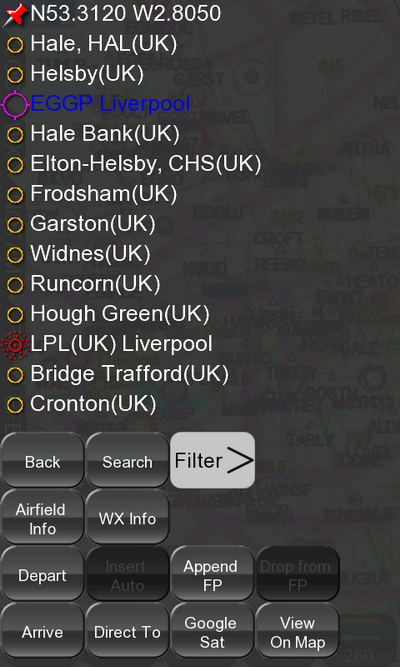 |
- Tap on “EGGP Liverpool” and it turns blue to show that it has been selected from the list.
- Tap Arrive to tell EasyVFR that you wish to use “EGGP Liverpool” as your airport of arrival (Destination).
Congratulations! You’ve now created your first Route! The map will now show a simple direct to flight plan.
 |
So let’s add in our two via points.
- Press and hold on the approximate location of “Llandudno”. You’ll get the now familiar nearby items list:
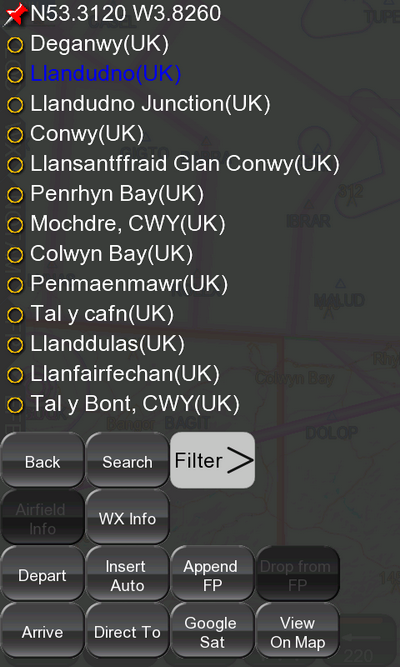 |
- Tap “Llandudno” to select it and it will turn blue. If you don't know the approximate location of Llandudno then press and hold anywhere on the screen, and in the resulting nearby objects list tap the Search button at the bottom of the screen and type in “Llandudno” and press OK.
- At the bottom of the screen tap Insert Auto. This will automatically insert Llandudno at the most appropriate position in your Route and update your flight plan line accordingly.
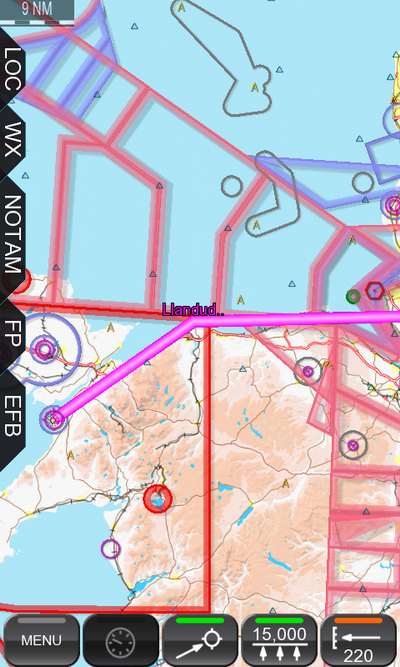 |
- Adding in the WAL VOR is just as simple. Press and hold on its approximate location for 2 seconds.
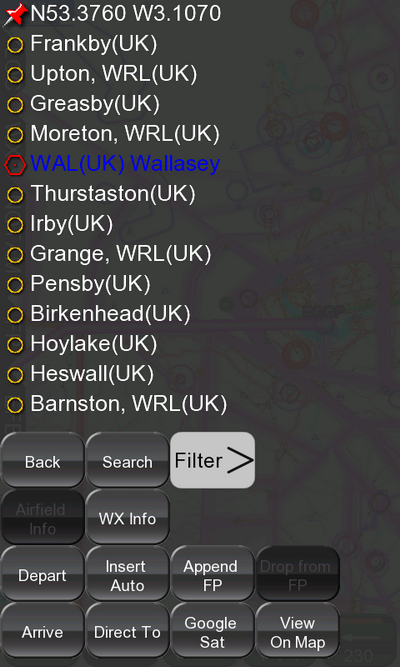 |
- In the pop up nearest objects list tap WAL (UK) Wallasey.
- Again press Insert Auto to insert it into your Route.
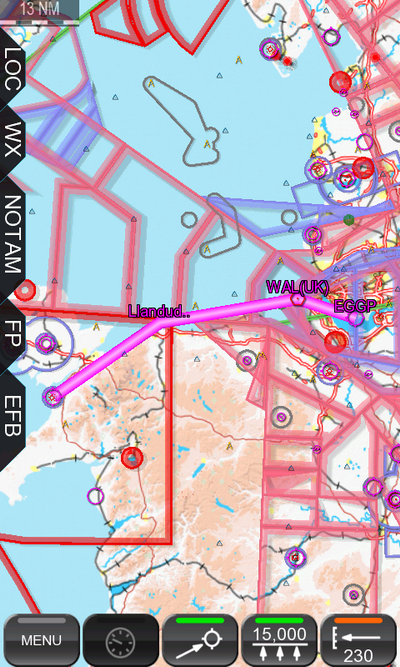 |
- That’s it! Your Route is has now been created with the two waypoints.
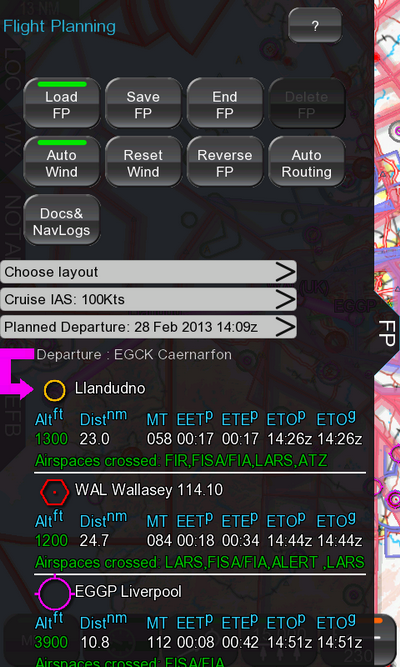
You can tap on the FP (short for FlightPlan) tab to see a summary of your route. There are many other things that you can do on this tab, including changing your planned altitude. There are other short guides available to show you how to use these functions.
 |
Note: We believe that we have created the simplest possible way of creating a flight plan that is optimised for using your finger both on the ground and in the cockpit.
For those that are more familiar with rubber banding, this is also possible. You can press and hold on the flight plan line and after two seconds the flight plan line will change color. You can then rubber band the line to wherever you want and let go. You’ll then get a list of the nearest objects which you can select from, as you did above.
While this might be acceptable on the ground, in-flight rubber banding can make adjusting your route very difficult as even mild turbulence can result in your finger leaving the screen and as a result the flight plan gets dropped in a point that you did not desire. Unlike many other systems, in EasyVFR you still have the option of cancelling this entry on the nearest objects list, so you don’t have to deal with having to remove the undesired point.
However if you use the preferred method described in this guide, you can avoid that problem altogether!
