WX briefing explained.
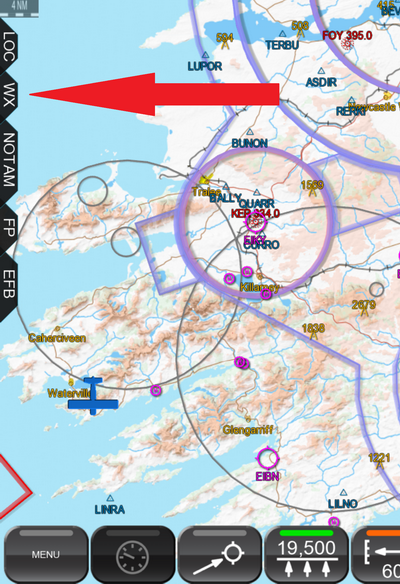
- The weather briefing system is centered around the WX (weather) tab. To get started tap the WX tab to open it.
 |
- In order to activate the Weather Briefing System, you need to switch on the WX Master switch. It is switched on when its green light bar is illuminated.
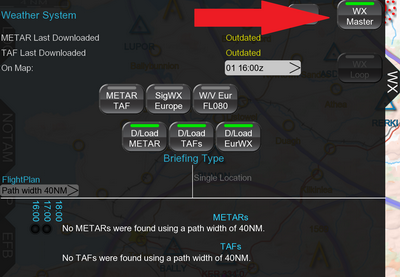 |
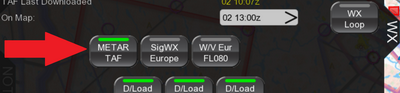
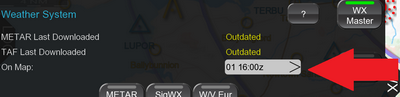
- The date and time when weather data was last downloaded is shown in yellow near the top. If the data is quite old it will be simply shown as "Outdated".
 |
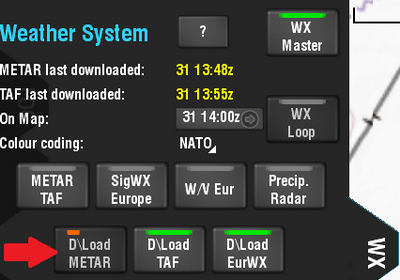
- To get started you need to download weather data. This is done with the three buttons marked "D/Load".
| To download METARs tap the D/Load METAR button, | ||
| To download TAFs tap the D/Load TAF button. | ||
| To download European hour by hour professional aviation weather forecasts and winds aloft, tap the D/Load EurWX button. |
The buttons will indicate the download progress with a light bar across the top which illuminates from left to right as the download progresses.
 |
- When the downloads have completed you are ready to start your briefing. To see weather on the map, use the buttons which are directly above the download buttons used in the previous step.
To brief METARs & TAFs on the map, press the button labelled METAR TAF. The Precip. Radar button will overlay a 'rain radar' on the moving map.
To see the European hour by hour professional aviation weather forecasts from TopMeteo, press the SigWx Europe button.
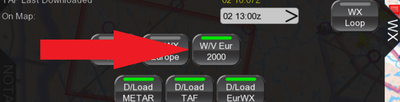
To brief the winds aloft tap the button marked W/V Eur.
 |
- Turn the METAR TAF button on (indicated by the green light bar), and switch the SigWX and W/V Eur buttons off for the moment.
 |
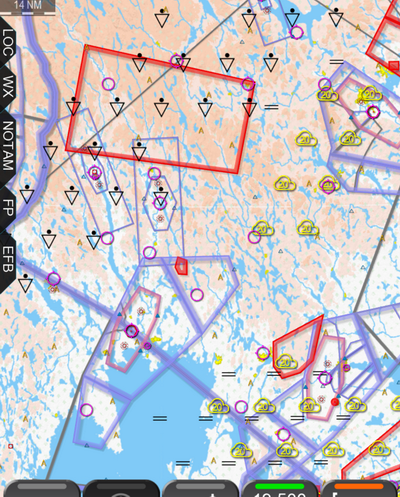
- When the METAR TAF button is switched on, color-coded circles appear around any airport reporting a valid METAR or TAF. The color of that circle indicates the weather at that airport.
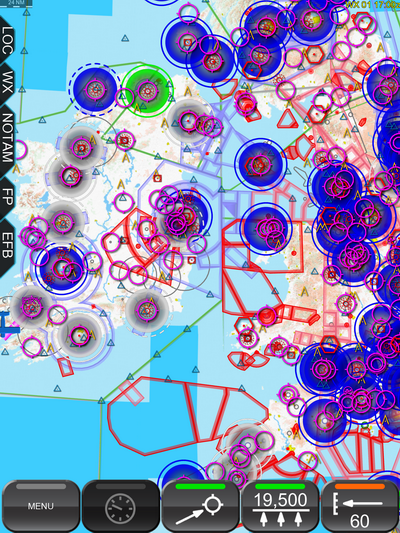 |
By default, the colors follow the NATO weather coloring scheme but via the Colour Coding control you can select GAFOR and OrbiFly schemes as well. To see a detailed definition of what the colors mean you can tap the ? button at the top of the WX Tab and read more detailed information on the weather system.
However for the purposes of this guide you can think of the colors as follows (NATO coding assumed):
| Blue | Good VFR conditions | ||
| White | Marginal VFR conditions | ||
| Green | VFR only when over low and familiar terrain | ||
| Yellow, Amber, Red | IFR conditions |
This system allows you to get a quick overview of the weather over a large area without having to look at the detail.
In the example above we can see that the weather across the UK is good VFR (blue circles on the right of the screen) and much of Ireland is marginal VFR (white circles) with occasional better VFR (blue circles).
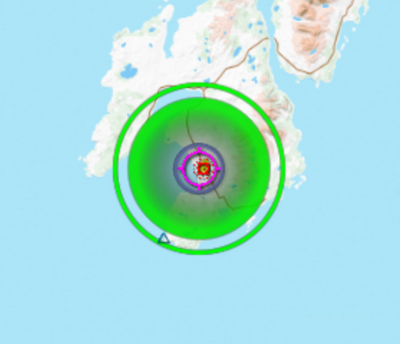
- The eagle eyed amount of you will have noticed that some of the circles are outlined by a solid circle and others by a dashed circle. Those with a solid circle have the color of the circle based on the weather in a METAR and those with a dashed line have the color of the circle based on the weather in a TAF.
Example: A METAR indicated by a circle outlined by a solid line
 |
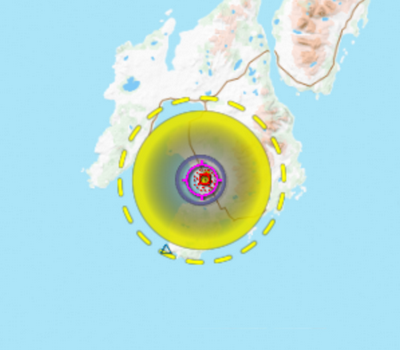
Example: A TAF indicated by a circle outlined by a dashed line.
 |
A METAR will be used provided one is available which was produced close to your reference time. If no such METAR is available, then a TAF which is valid at your reference time will be used instead.
If the color of the circle is based on a TAF it will take into account weather changes indicated in the TAF such as “Becoming”, “From”, “Tempo” etc.
You can change the reference period on the WX tab by tapping the grey control beside the heading "On Map". In the example below the date is set to the first day of the month at time 16:00 UTC.
 |
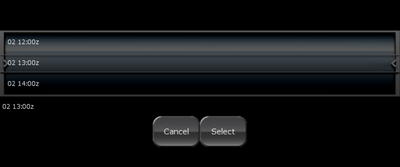
- This will bring up a drum selector which you can use the set the date and time before tapping Select.
 |
- You can see the detail for any of these METARs or TAFs by pressing and holding for two seconds on the location on the map that you are interested in.
- This brings up a "Nearest Objects" screen. In the list, tap on the name of the location that you are interested in getting a weather briefing centered on. In this example the exact location indicated by the latitude and longitude has been selected.
 |
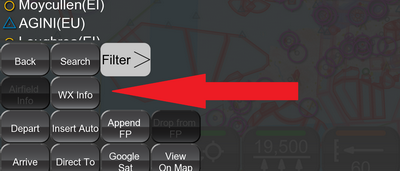
- Tap the WX Info button near the bottom of the screen.
 |
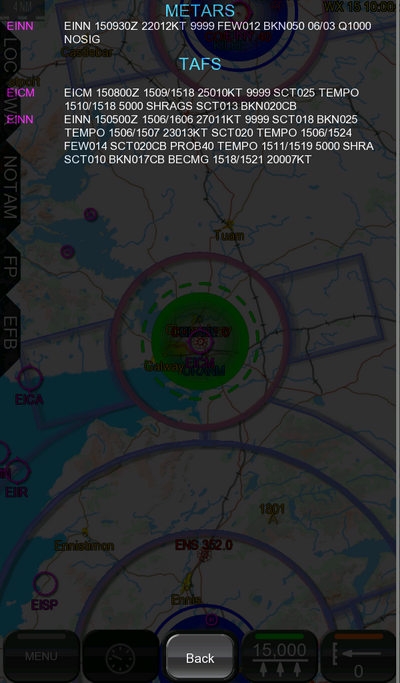
This will bring up a list of METARs and TAFs that are available within 50 NM of the location that you have selected above.
 |
- Once done, press Back to return to exit the METARs and TAFs screen.
- Open the WX tab again by tapping it.
- Now turn off the METAR TAF button and turn on the SigWX Europe button.
 |
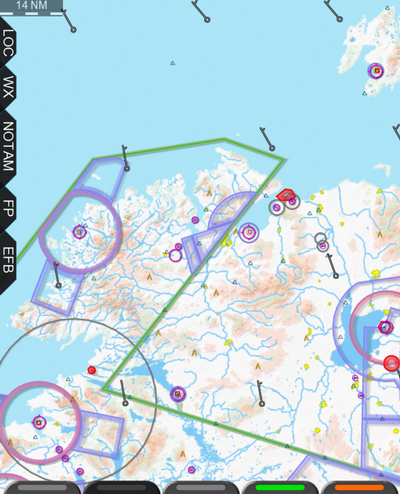
- You will see that the map now has a number of symbols placed on it to indicate the type of weather forecast for that location at the reference time.
 |
In this example we can see some forecast showers shown in the top left of the screen, some forecast isolated 2000ft clouds in the right and bottom right of the screen, and some forecast mist in the bottom right of the screen.
If you wish you can change the reference time on the WX Tab as described earlier for the METARs and TAFs. You can also set the reference time to roll forward 1 hour every few seconds. This is described later in this guide.
These symbols follow the ICAO standard. To see what the symbols mean, tap the ? button on the WX Tab.
- Now return to the WX Tab and turn off the SigWX Europe to clear up the map again.
- Then tap the W/V Eur button to select wind vectors for winds aloft.
|
- You will be presented with a drum selector to select the altitude that you want the wind vectors to be displayed for. You can roll this drum until it has the altitude that you want. When selected, the altitude will be shown just below the roll drum. When the altitude that you want is show on and below the drum, tap Select to set it.
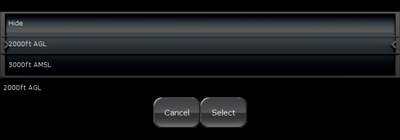 |
- The altitude for the wind vectors will now be shown on the button.
- If you now look on the map you can see the wind barbs shown for your selected altitude. These follow the ICAO standard which you can see explained in more detail by tapping the ? button at the top of the WX Tab.
 |
- You can also see the METARs and TAFs with their color code on the WX Tab.
This operates in two modes which are automatically selected by EasyVFR:
| FlightPlan shows the weather along your route which you have a Flight Plan loaded, | ||
| Single Location shows the weather within a set radius around a single location. |
For a flight plan briefing, a tunnel of a given width is created around your planned flight track. Any METAR and TAF reports which fall inside this tunnel are listed at the bottom of WX tab.
For a Single Location briefing, a circle of a given radius is created around a set location. Any METAR and TAF reports which fall inside this circle are listed at the bottom of the WX tab.
For a tunnel briefing you can select the tunnel width by tapping the grey "Path width" control.
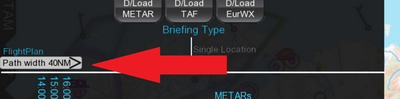 |
For a Single Location briefing you can select the radius of the circle by tapping the grey "Radius" control.
 |
In both cases this brings up a drum selector which you can roll with your finger to select the desired distance. You can change the selected distance by rolling the drum up or down with your finger. After you stop rolling the selected distance will be shown just below the drum. Once this is on the desired distance, tap the Select button and the new distance is selected.
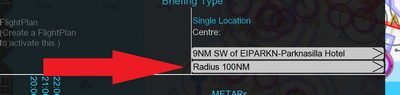
For a Single Location briefing you can select the circle location by tapping the grey control which shows the current center location.
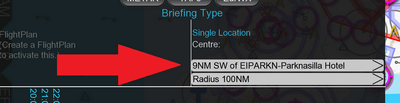 |
All METARs and TAFs which fall inside your briefing area will be listed on the bottom part of the WX Tab. Between the airport code and the weather report will be three colored circles, each under a timestamp.
The color of the circles gives a quick indication of the weather at that location at the time listed above it.
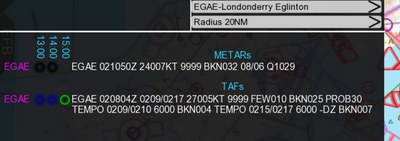 |
In the example above the reference time is set at 1300z. No colored circles are shown for the METAR EGAE because the METAR relates to 1050z and cannot provide any useful information about what the weather will be at EGAE between 1300z and 1500z.
The TAF contains two TEMPO periods. The first one will have expired by 1300z so the TAF shows a blue circle for 1300z and 1400z indicating good VFR conditions at those times. The second TEMPO commences at 1500z which indicates a significant deterioration in the weather and accordingly the circle for 1500z is colored differently.
Using this summary with a FlightPlan loaded allows you to see how the weather is forecasted to change along your route over the duration of your planned flight.
- Earlier in this guide you learned how to show particular types of weather on the moving map. You also learned how to adjust the reference time so that the weather shown on the map reflects the weather at a desired time.
You can also set EasyVFR to loop though all available data, showing each hour for a few seconds before showing the next. This can be extremely useful if you want to see how the weather is forecast to change over a given time period. To do this open the WX tab, and tap the WX Loop button.
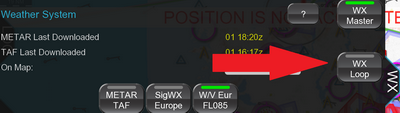 |
The weather shown on the map will now loop through the entire known forecast period. The date and time that the weather displayed represents is shown on the top right of the screen.
 |
In this example the weather is currently showing for the first day of the month at time 17:00UTC
- To stop the loop simply open the weather tab again and tap the WX Loop button again.
